Connecting Databricks GCP to Churney

Updated Nov 2026

Share hashed Unity Catalog views with a service principal made for Churney. Five steps, or let Claude do them.

At a glance: Read-only on hashed views · Personal data hashed in your workspace · A service principal just for Churney

Churney reads hashed views in Unity Catalog as a service principal you create for us. Each sync exports them through an external location to a Cloud Storage bucket that Churney owns. Anything that identifies a person is hashed before it leaves your workspace.

Let Claude set it up

Before you start

  • Workspace admin rights in Databricks
  • Unity Catalog, with your raw tables in a catalog
  • A SQL warehouse Churney can use. Serverless is cheapest to keep idle.
  • The name of the Churney bucket, which we send you

What to share

As much as you can. Each of these makes the predictions better:

  • Payments
  • Trials, if you have them
  • User demographics, if available
  • User activity
  • Attribution: your source of truth for campaign performance (UTM, MMP or ad network)

Step 1. Create the hashed views

Create two schemas in your catalog. churney_views holds the views. churney_exports stays empty: we write temporary tables there during each sync.

Create the schemas

Then create one view per table you share. Each view hashes the columns that can identify a person, such as email, phone, name, birthday and street address, and passes everything else through unchanged.

Fill in your names below and copy the SQL. Rather we write the views for you? Use the List your columns tab and send us the result.

Open the SQL builder

Then check a hash. Paste an email or phone number you know is in your data and compare the result with what your view returns.

Open the hash checker

Step 2. Create a service principal for Churney

  1. Click your username, then Settings > Identity and access > Service principals and click Manage.
  2. Click Add service principal, then Add new, and name it churney.
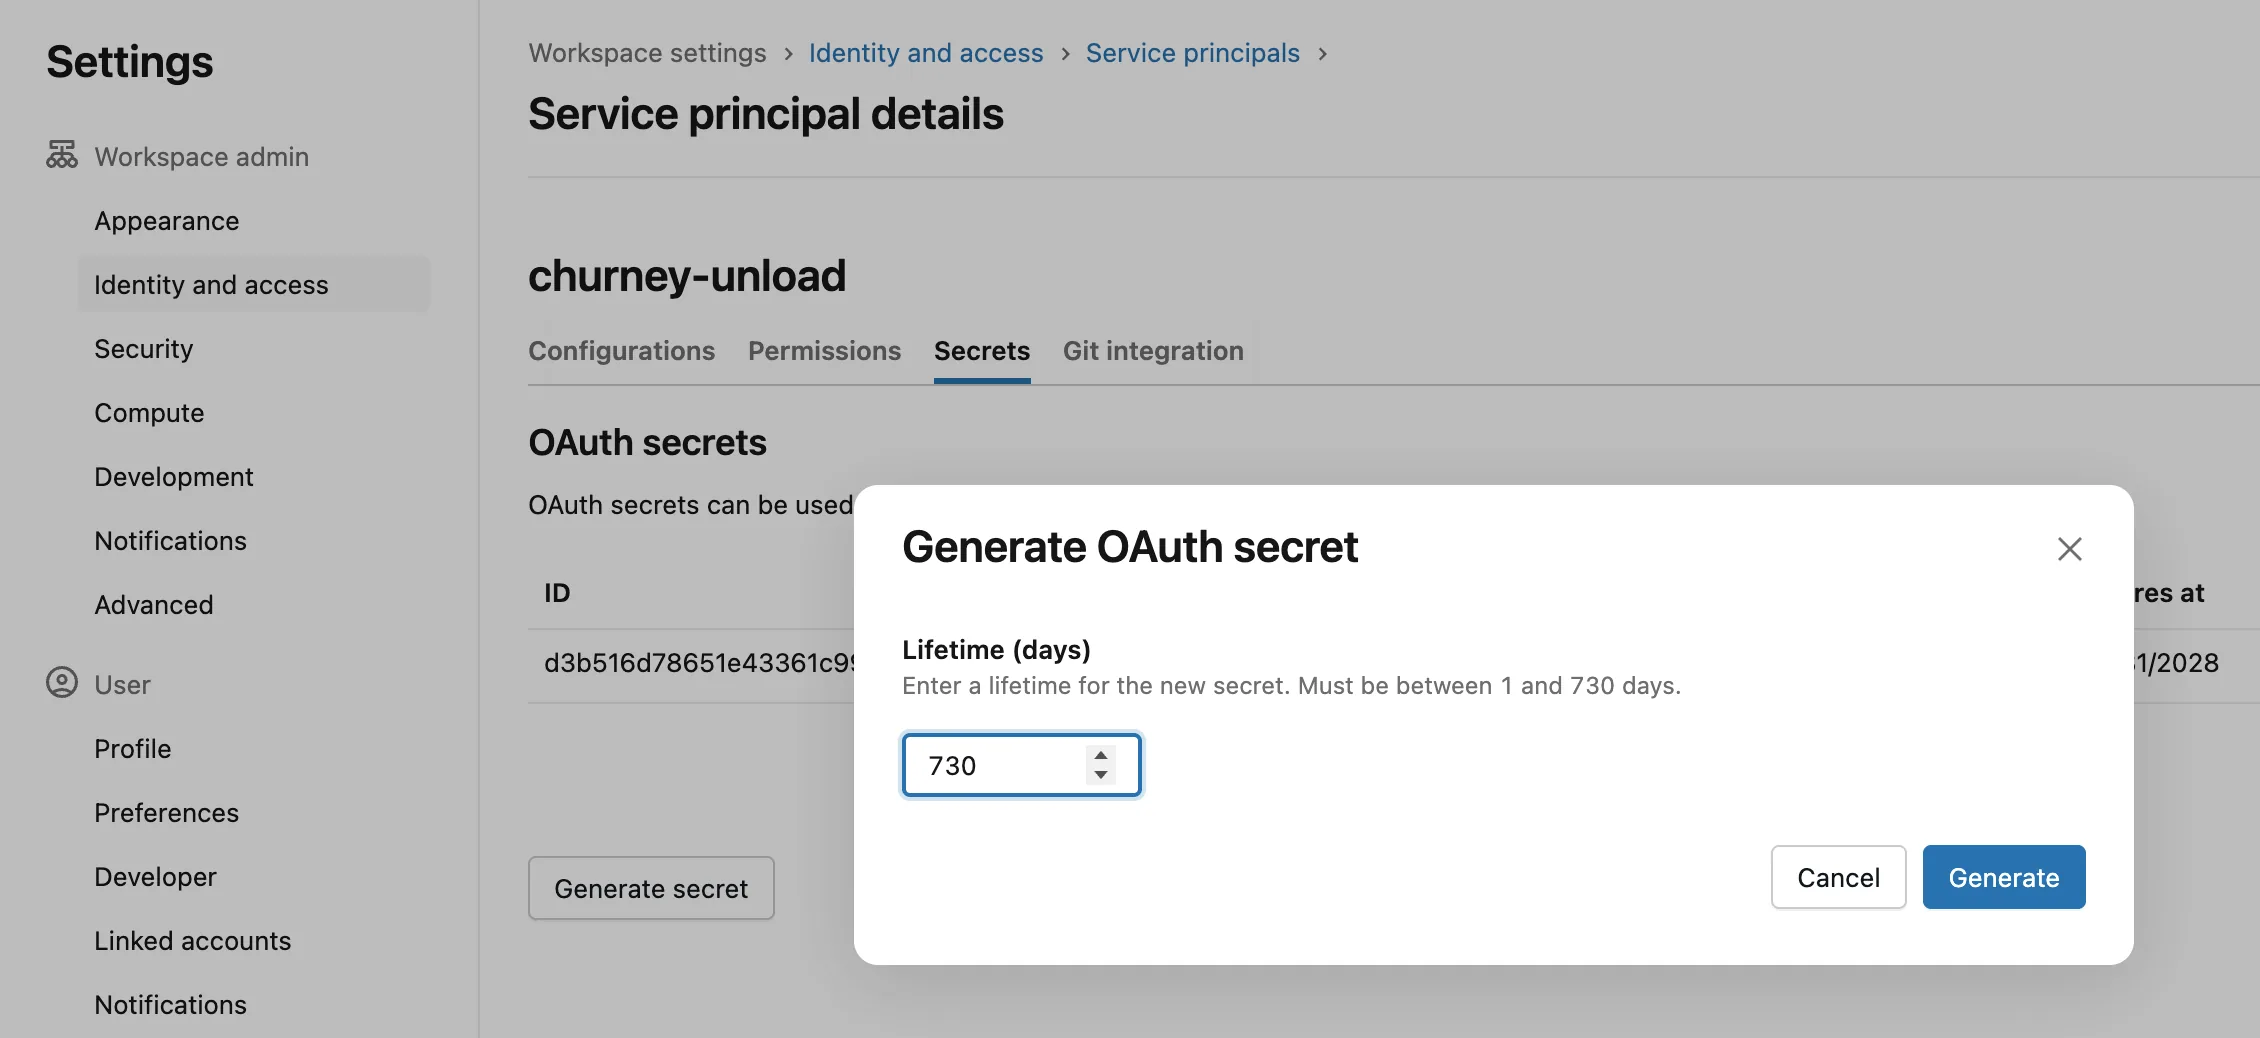
  3. Open it, go to Secrets and click Generate secret. Set the lifetime to 730 days, the maximum. Copy the client ID and secret straight into a password manager.
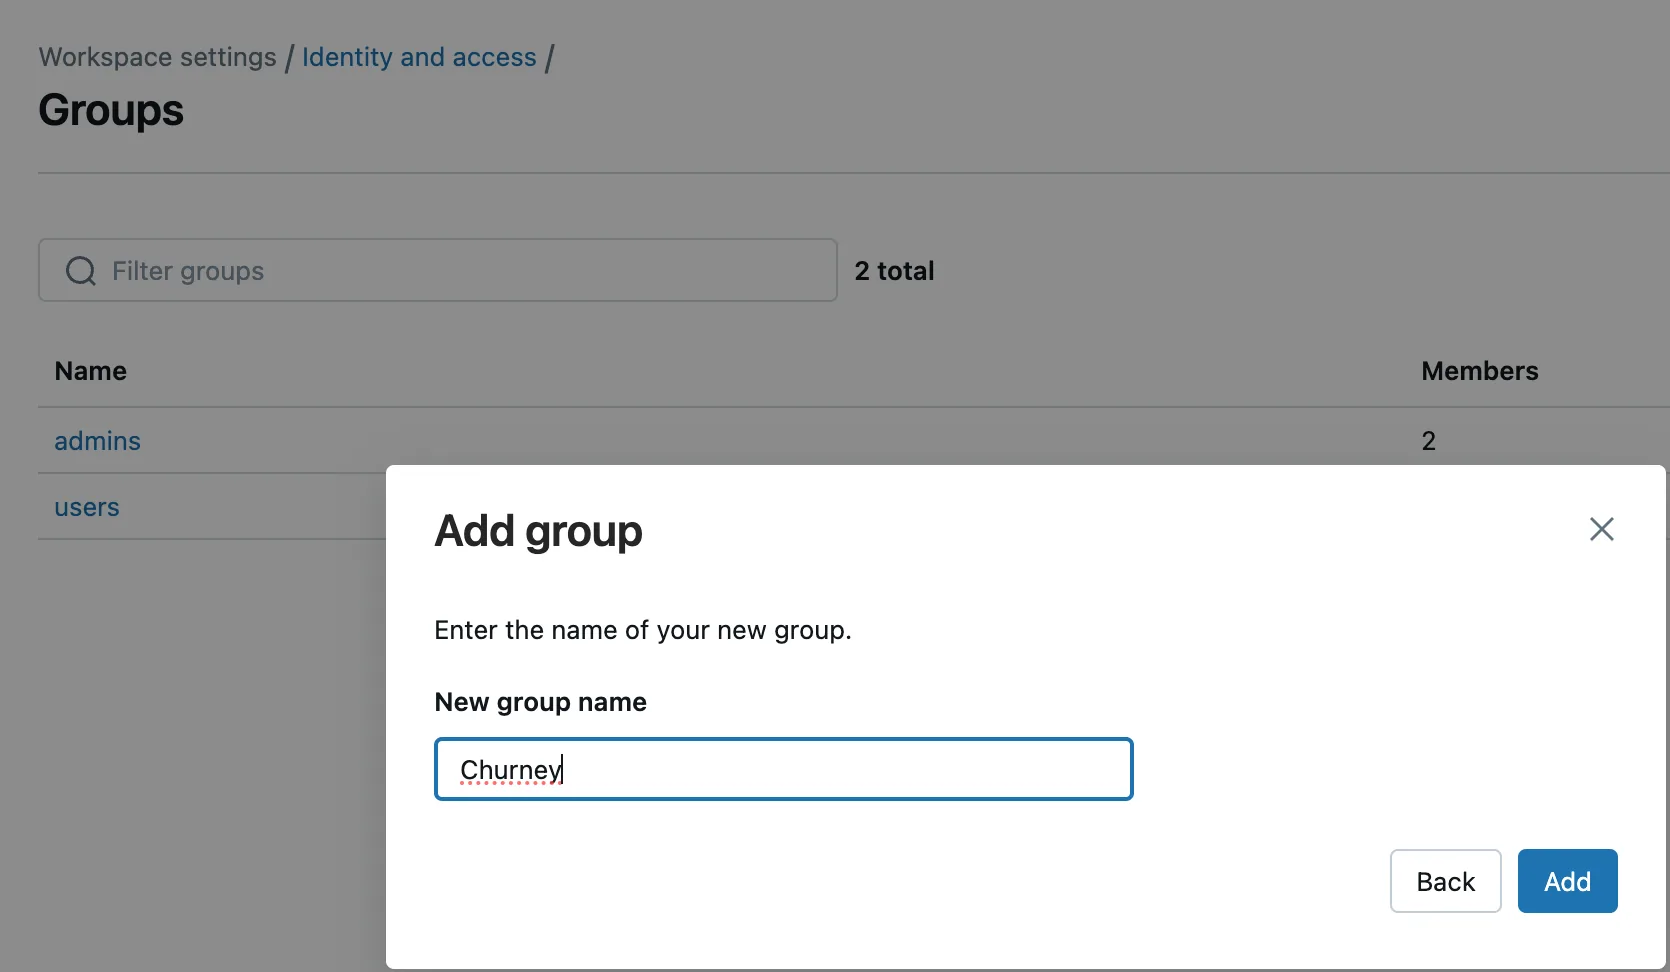
  4. Under Groups, create a group Churney and add the service principal to it.
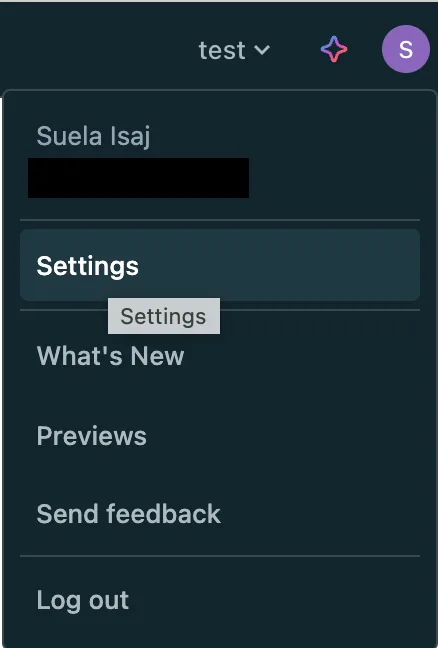
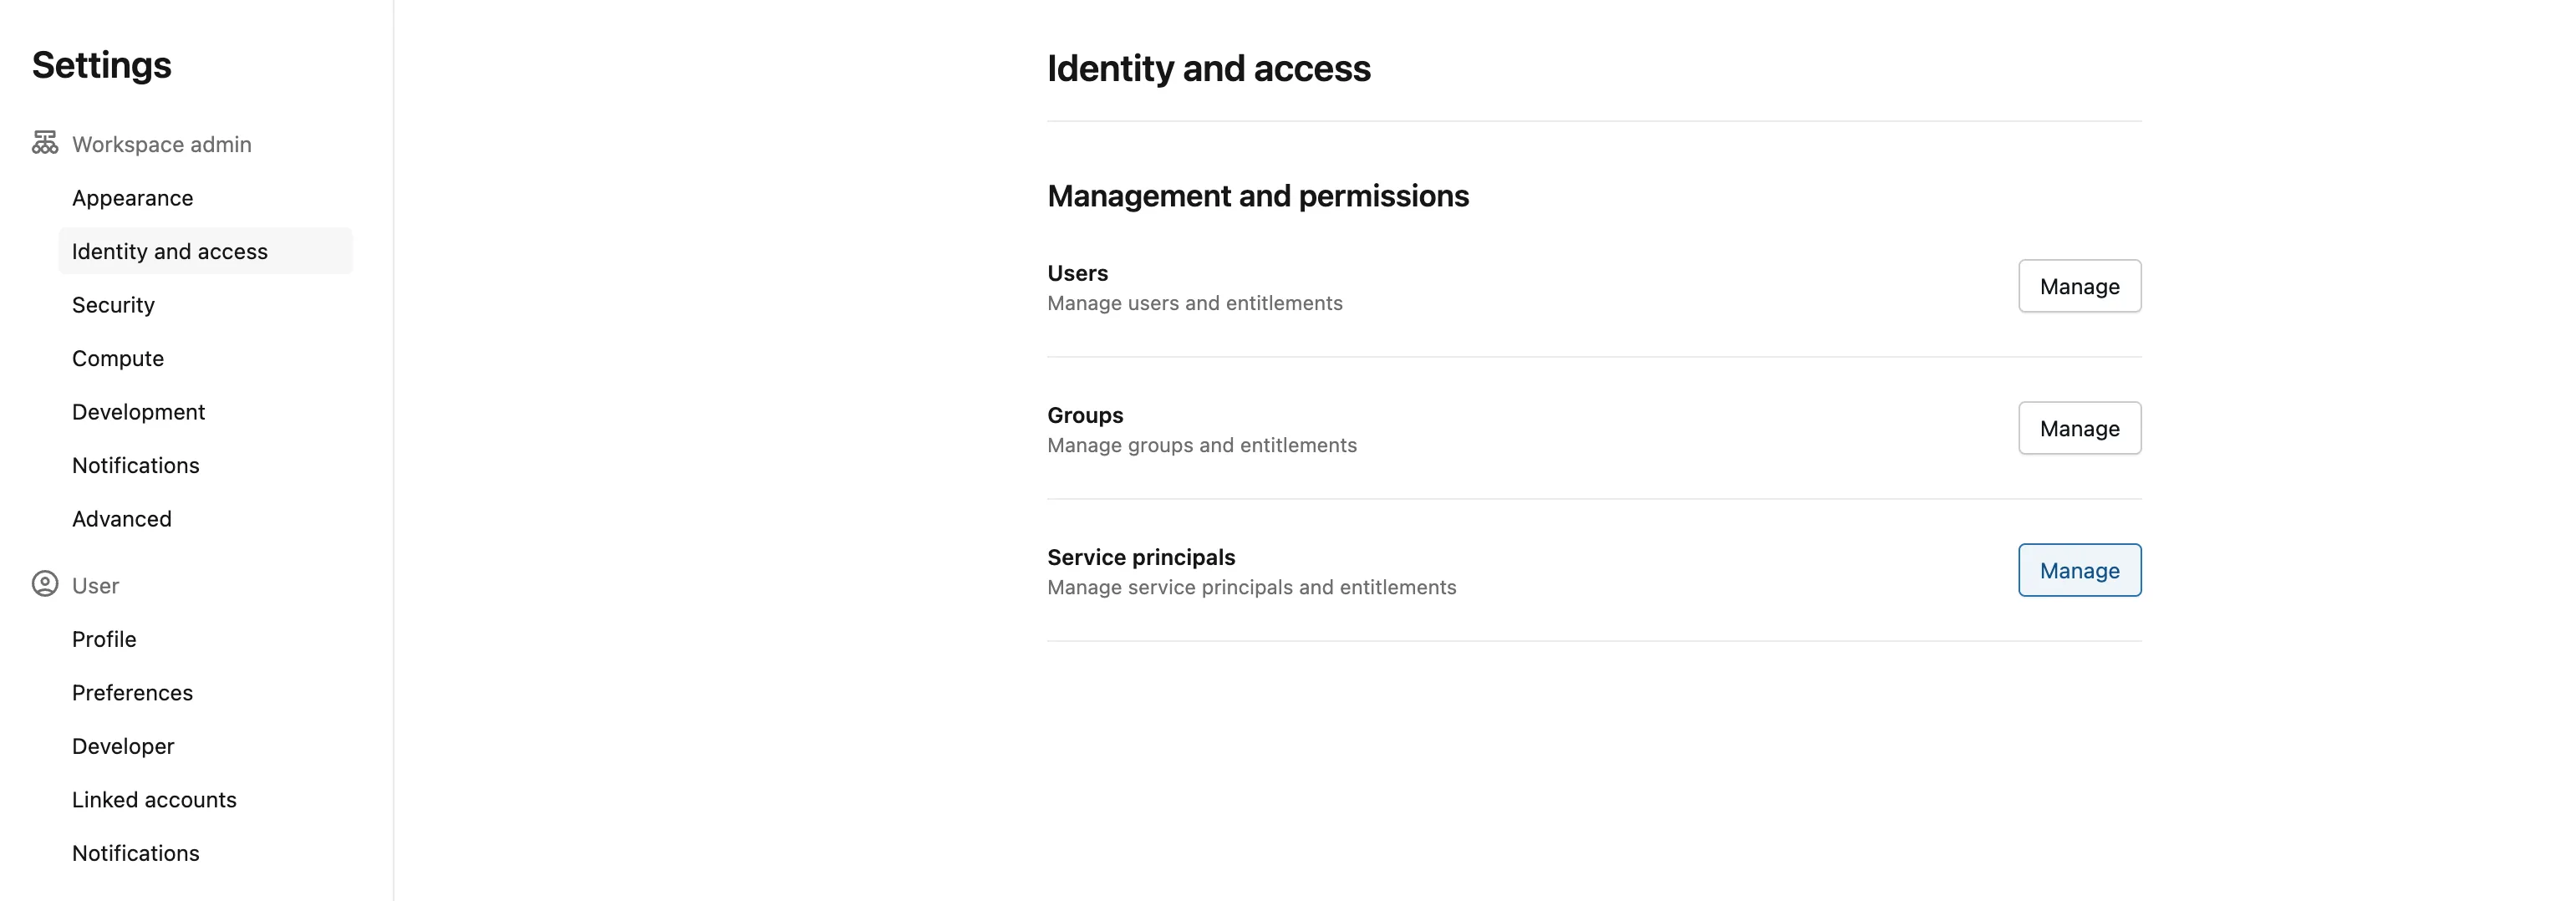
Identity and access settings in Databricks
Adding a service principal
Generating a secret for the service principal
Creating the Churney group

Step 3. Create a storage credential

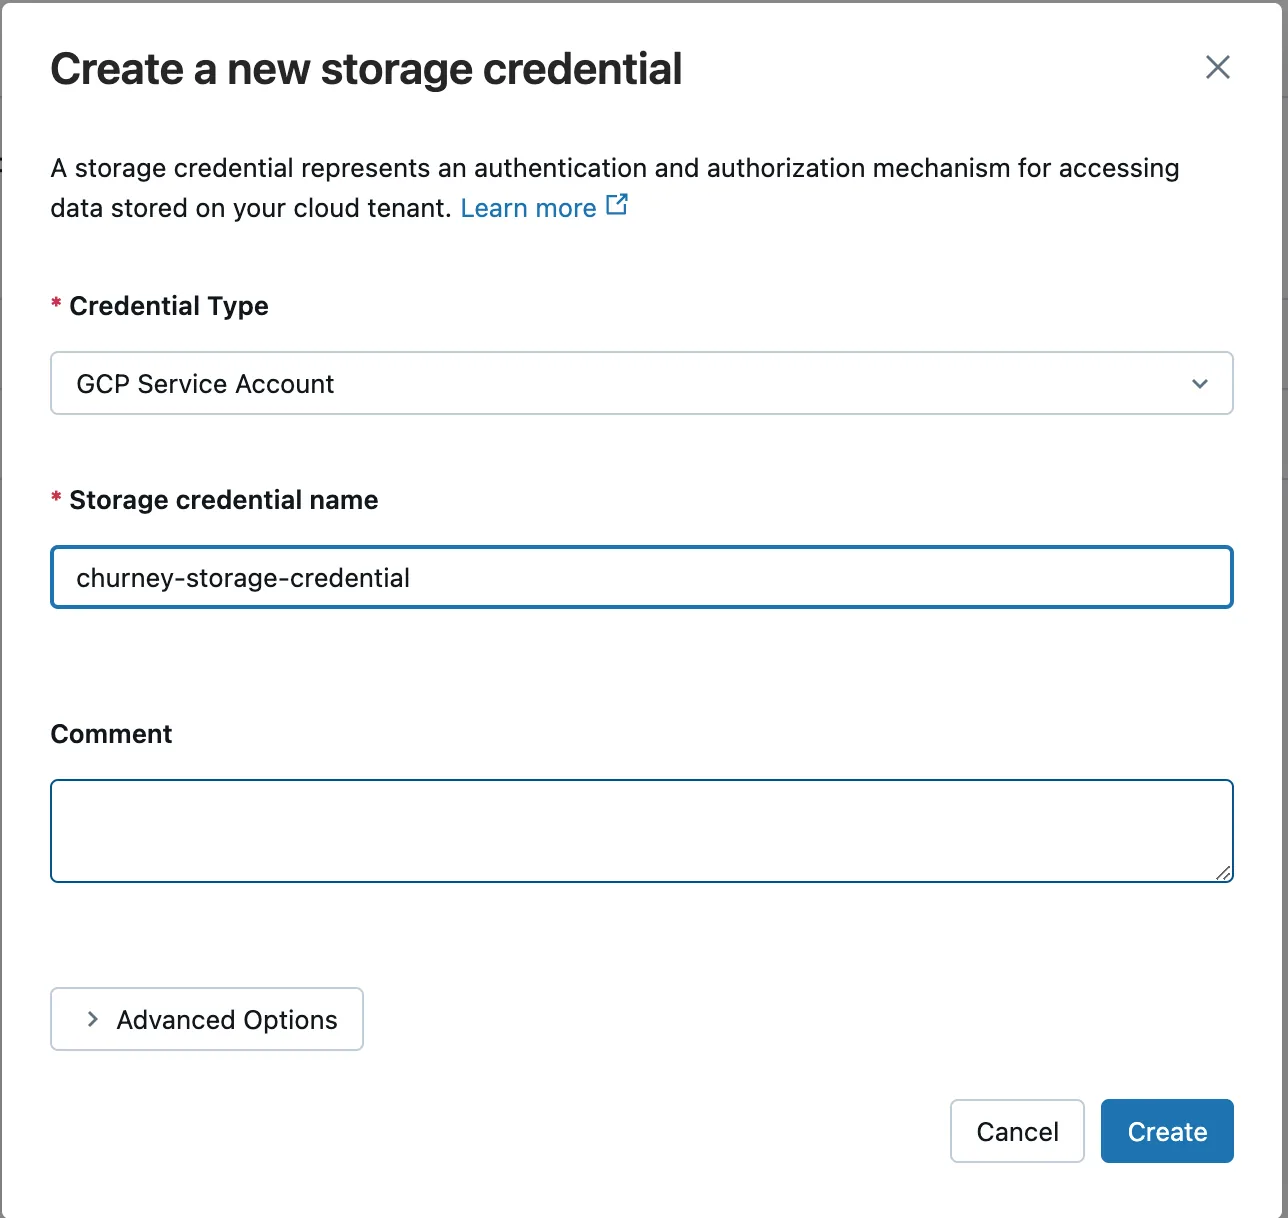
  1. Go to Catalog, click + and choose Create a credential.
  2. Pick GCP Service Account and name it churney_storage_credential.
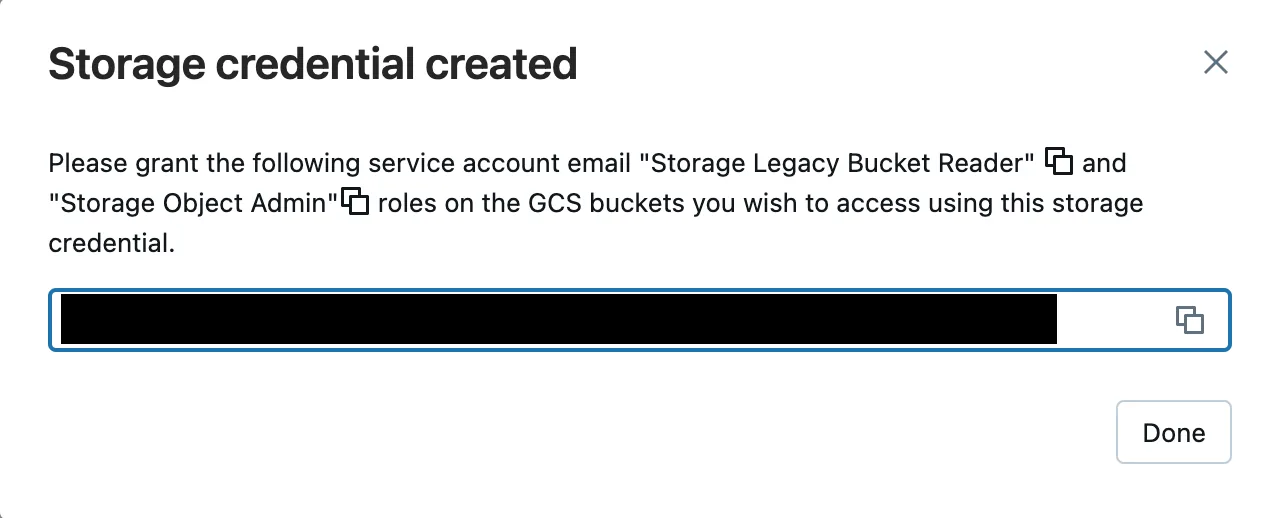
  3. Copy the service account email it shows and send it to us. We give it write access to the Churney bucket.
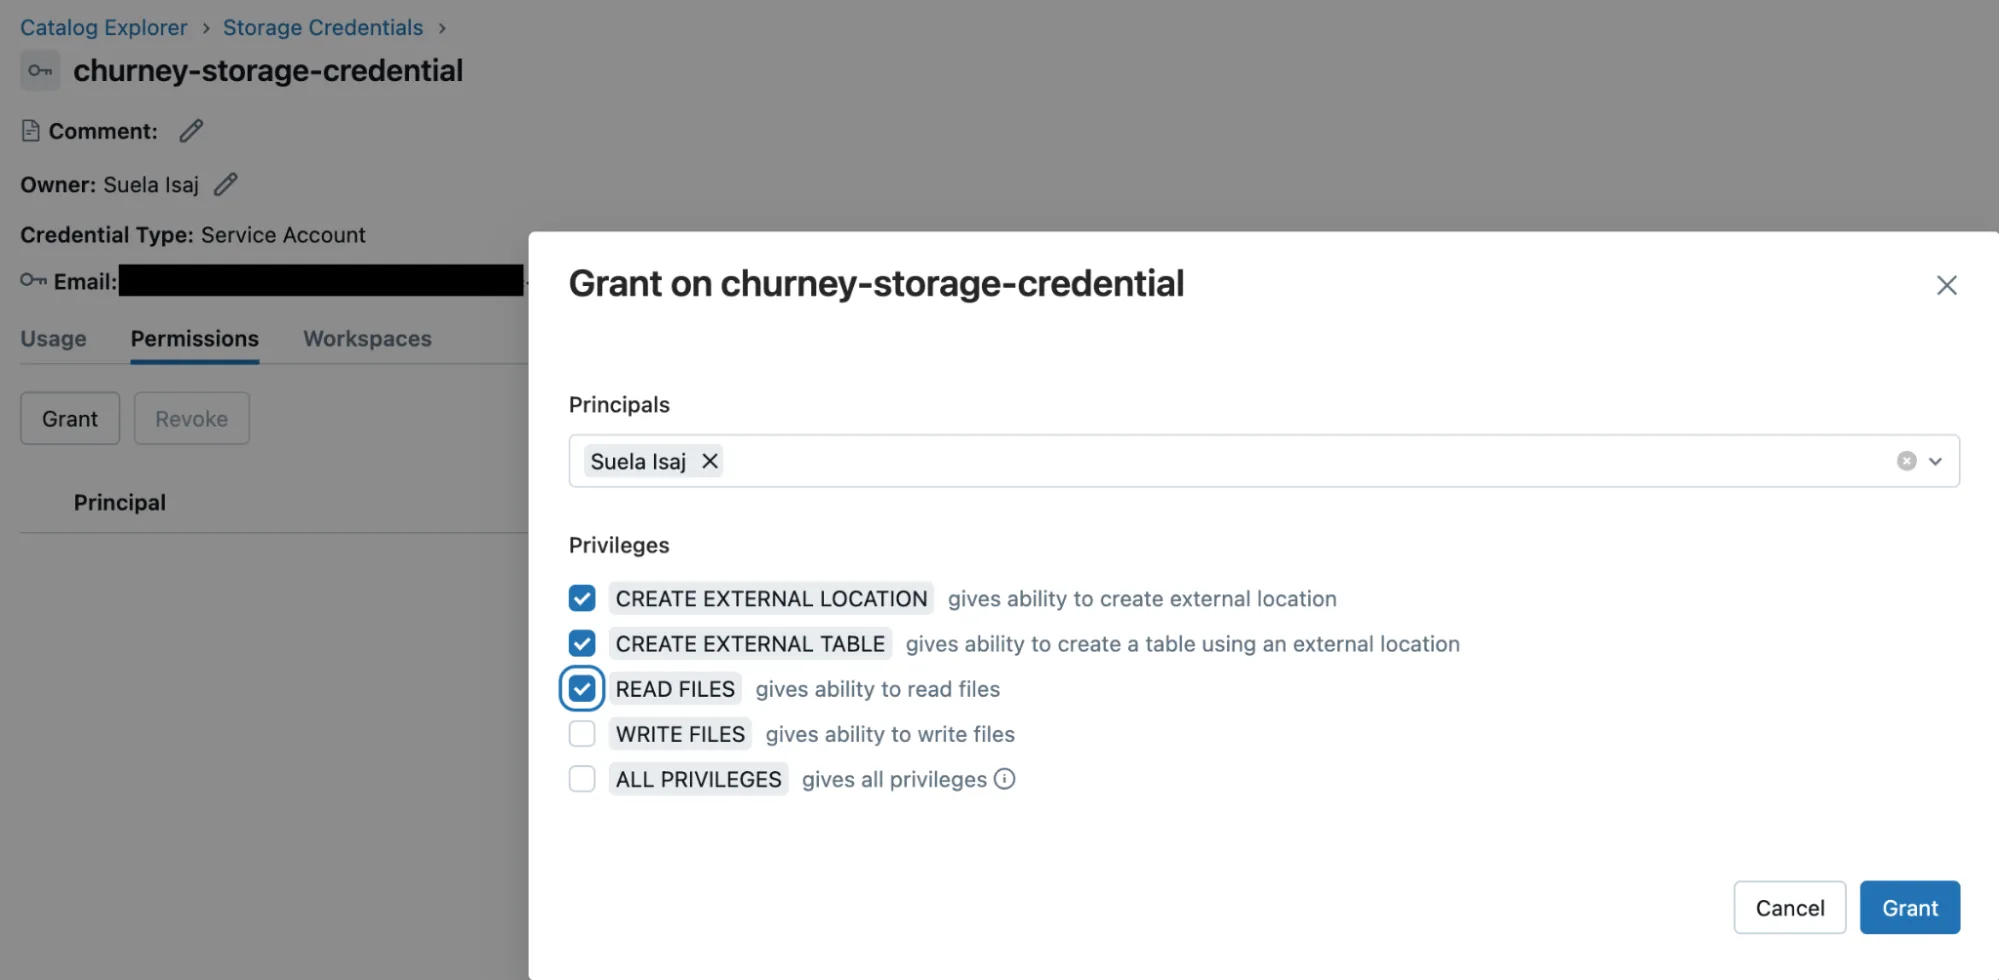
  4. On the credential's Permissions tab, grant yourself CREATE EXTERNAL LOCATION.

Then create the external location. Replace <churney_bucket> with the name we sent you.
Create the external location

Creating a storage credential
The service account of the storage credential
Permissions on the storage credential

Step 4. Grant Churney access

Run the grants in the SQL editor. They give the Churney group exactly what it needs and nothing more.

Grant access

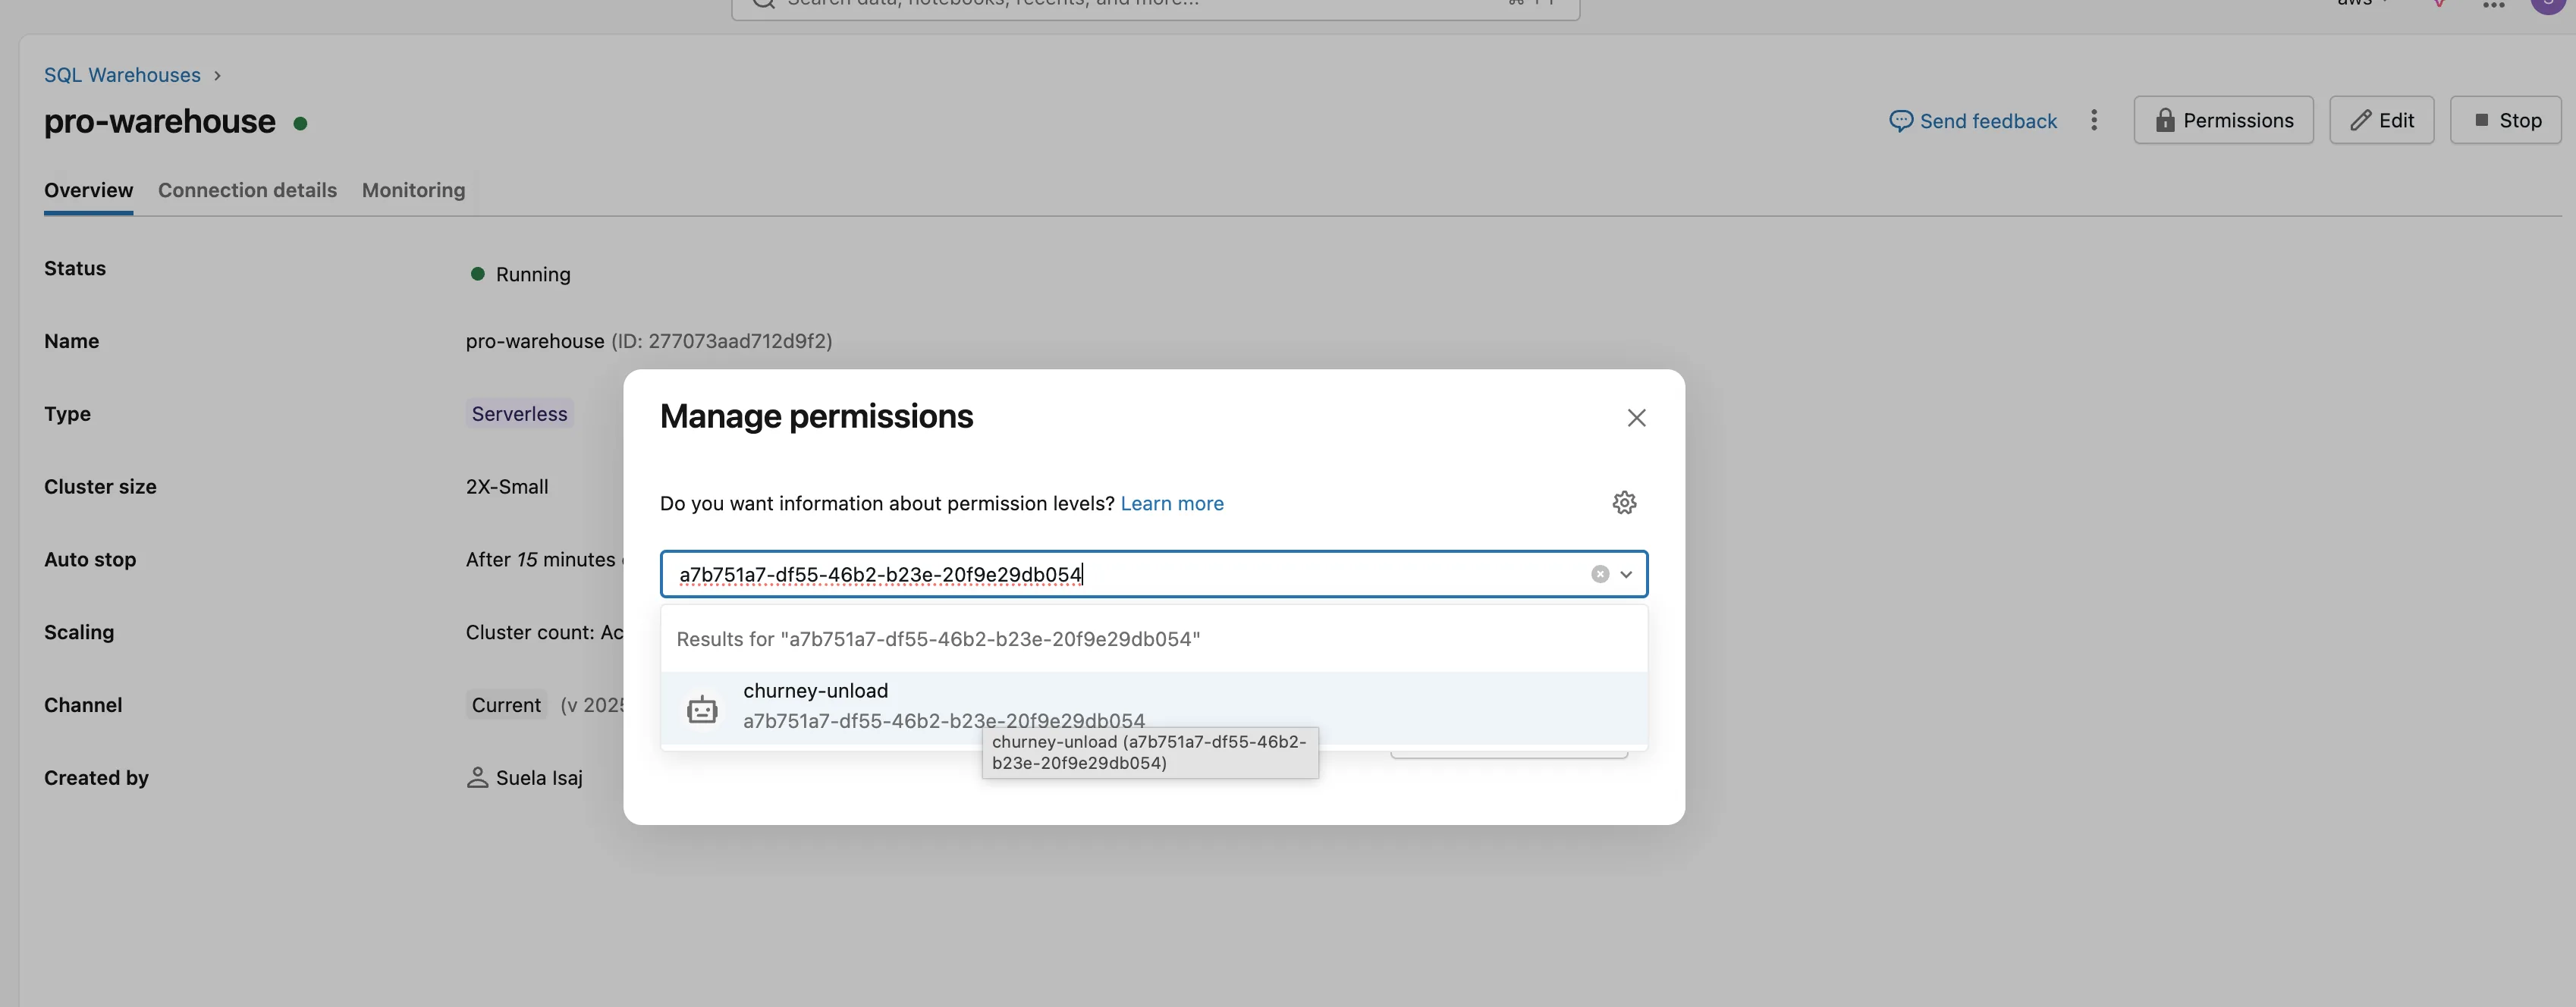
Prefer clicking? On churney_views, grant Churney the Data Reader preset. On churney_exports, grant it Data Editor. Then open your SQL warehouse, go to Permissions and give Churney Can use.
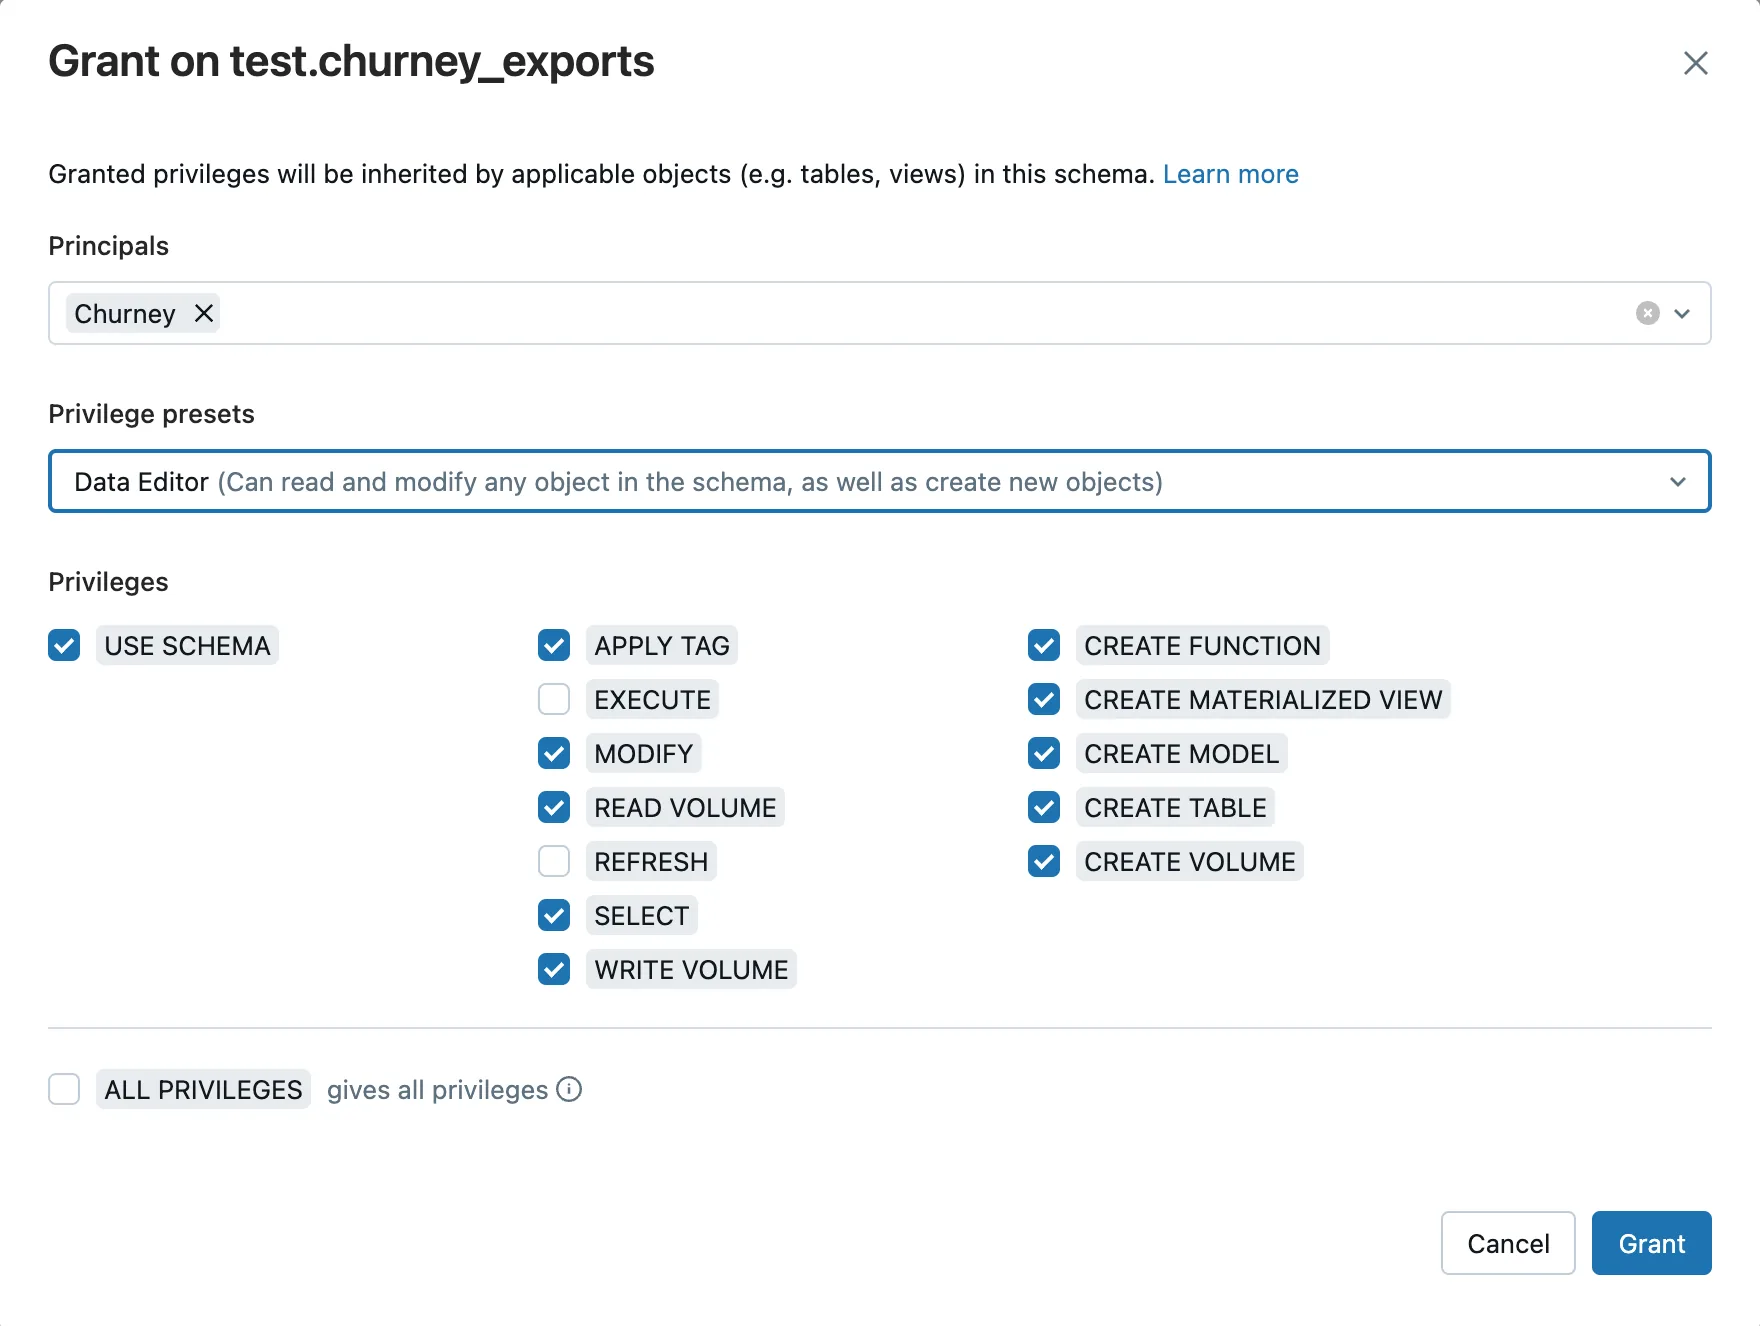
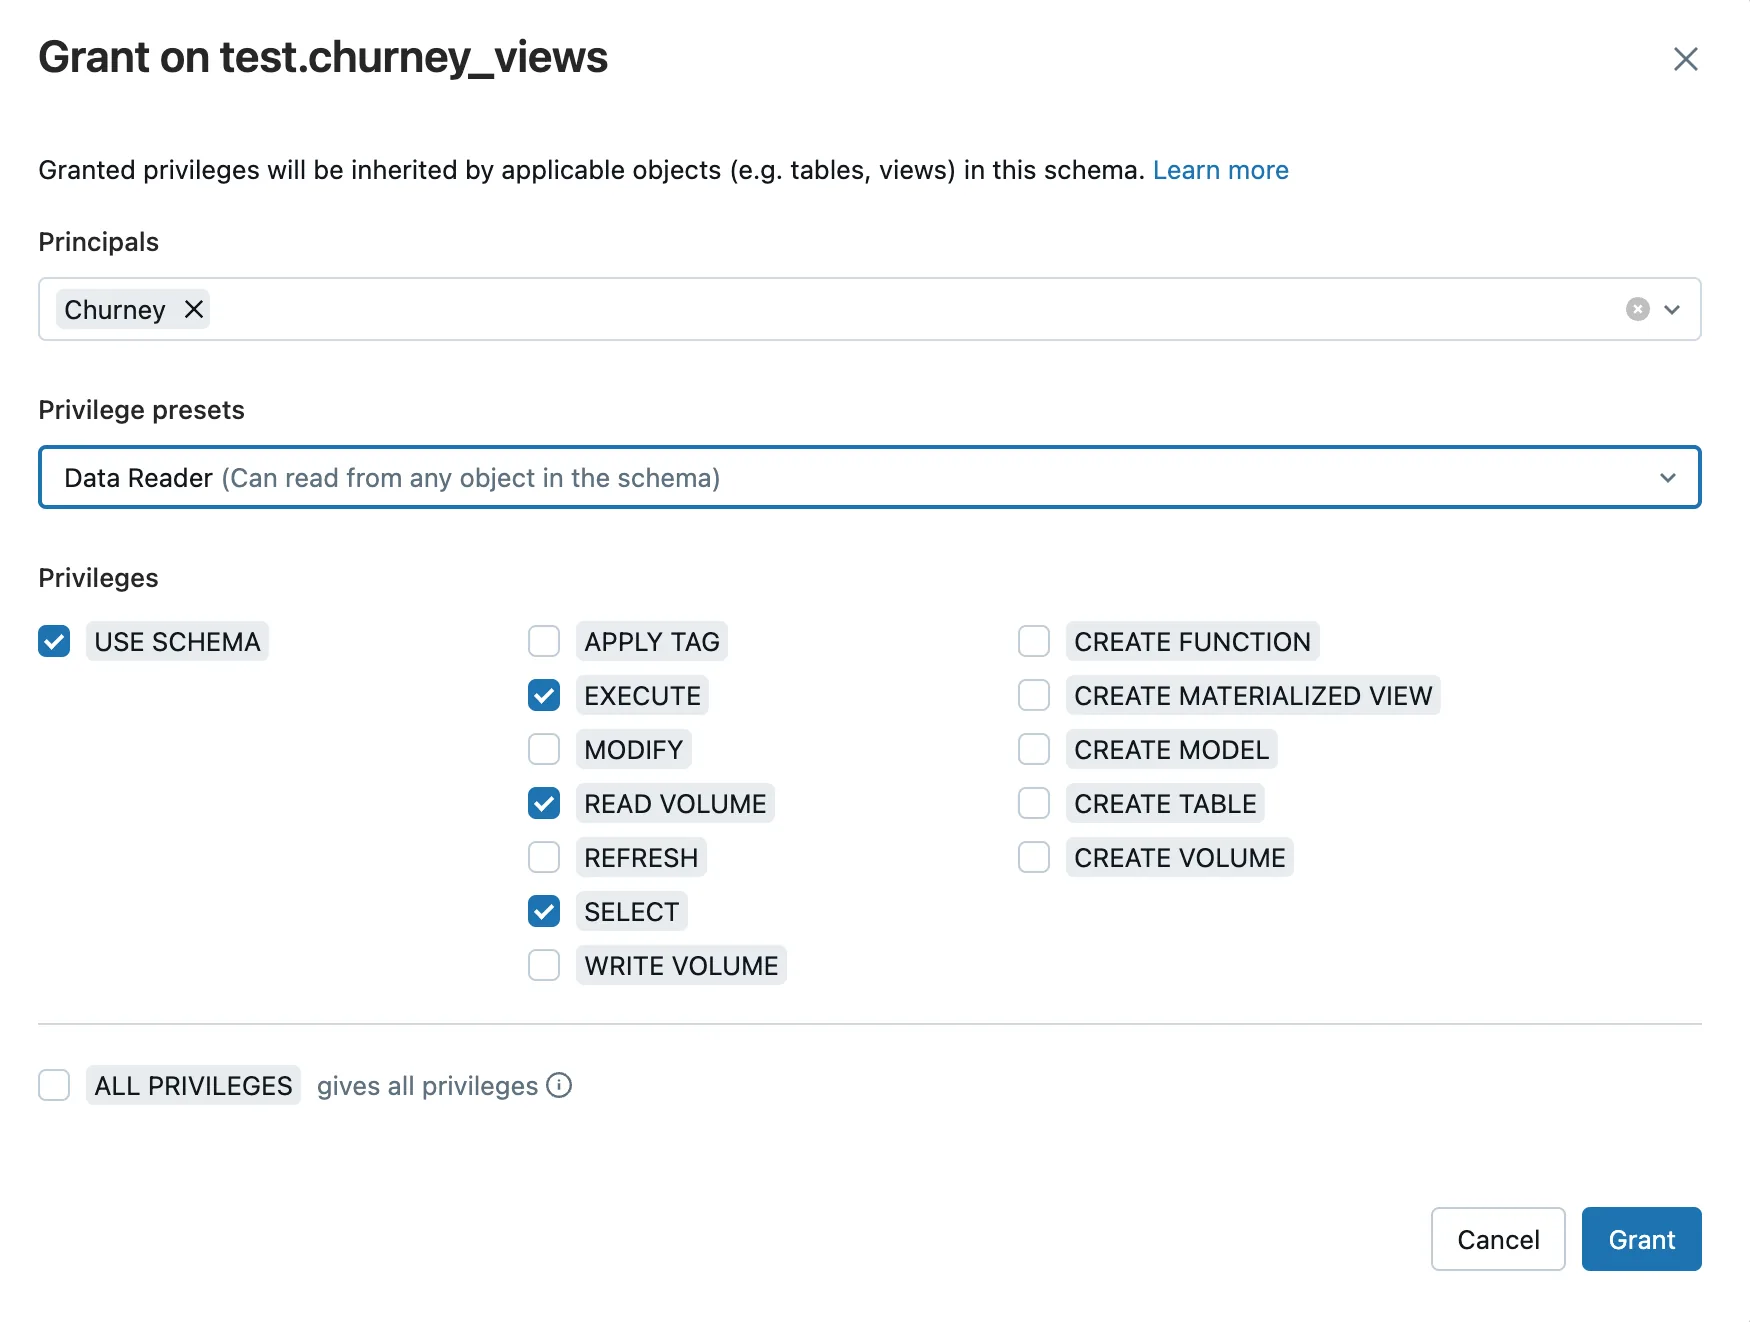
Data Editor on churney_exports
Data Reader on churney_views
Can use on the SQL warehouse

Step 5. Send us the details

  • The service principal client ID, and the secret through a password manager or a one-time link, not plain email
  • The region of your workspace, for example europe-west1
  • The catalog name
  • The service account email from step 3
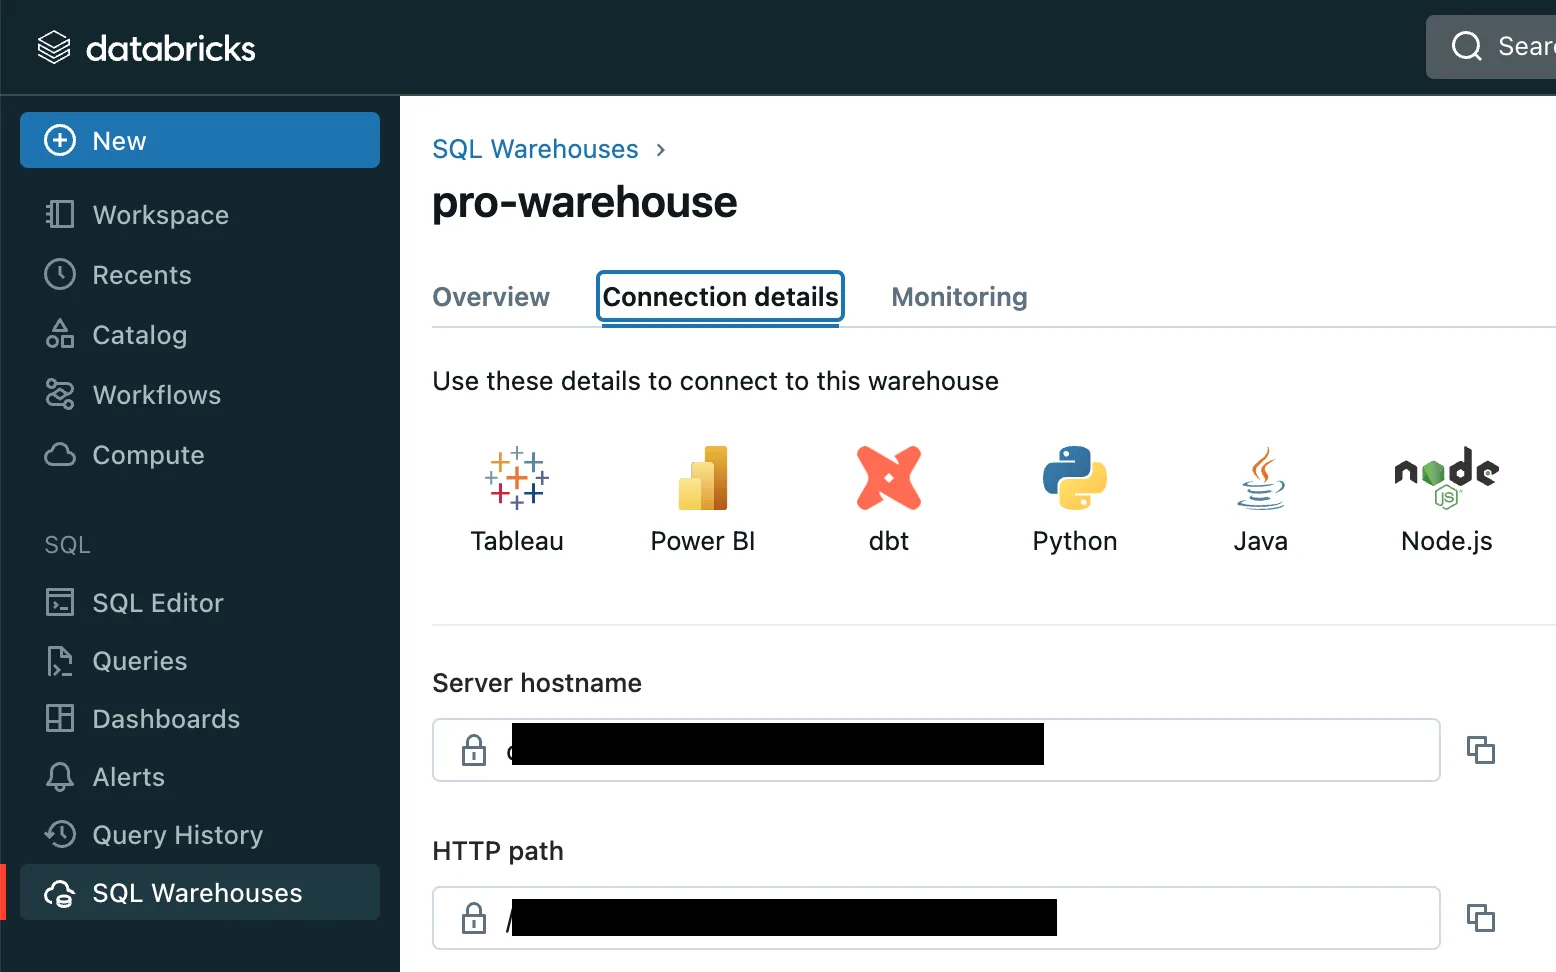
  • The SQL warehouse server hostname and HTTP path, under Connection details
  • The view names, and the timestamp column to use for incremental loads on each

We take it from there.

Where to find the service principal ID
Connection details of the SQL warehouse

What happens on our side

No action needed. This is here for your security review.

  • Read-only on your data. The service principal can read the views in churney_views and write only to churney_exports. It has no access to your raw tables.
  • Direct, incremental export. Each sync creates external tables in churney_exports from your views, which writes Parquet files to the Churney bucket. We pull only new or changed rows, using a timestamp column per view, with a safety window for late data. The queries run on your SQL warehouse.
  • Easy to revoke. Remove the service principal from the workspace and access stops.

Normalization rules

Normalization rules

See whether your data predicts long-term value.

Book a 30-minute call. We look at your setup and tell you plainly whether pLTV is worth testing.