
The short answer is as much as possible. The long answer is that Churney requires data about:
Additionally, we need to know the location (region) of your data warehouse.
To create the views, we would need to create queries to hash the PII columns.
For context, Facebook has a guide on how to hash contact information for their conversion api: https://developers.facebook.com/docs/marketing-api/conversions-api/parameters/customer-information-parameters. Google has a similar guide for enhanced conversions using their ads api https://developers.google.com/google-ads/api/docs/conversions/enhance-conversions. Basically, we want to hash columns that contain data which would allow one to determine the identity of a user: First name, last name, birth day, street address, phone number, email address etc.
Create a dataset named churney .
If the raw data contains email, phone, birthday or other identifiers, the columns need to be excluded and hashed in the view.
Example, if the raw data lies under raw_data.sensitive and you would like to create a view churney.sensitive_data_view
CREATE OR REPLACE <your_project>.churney.sensitive_data_view as (
select
SHA2(LOWER(TRIM(email)), 256) as email,
SHA2(LOWER(TRIM(name)), 256) as name,
SHA2(LTRIM('0', regexp_replace(phone, '[()-+-]', '')), 256) as phone,
SHA2(date_format(birthday, 'yyyyMMdd'), 256) as birthday,
* EXCEPT(email, name, phone, birthday)
from <your_project>.raw_data.sensitive
)
If you want to test it how the script looks with some data:
with sensitive as
(
 select 1 as id,
 "abc" as name,
 "abc@abc.com" as email,
 current_date() as birthday,
 '+4511111111' as phone
)
select
SHA2(LOWER(TRIM(email)), 256) as email,
SHA2(LOWER(TRIM(name)), 256) as name,
SHA2(LTRIM('0', regexp_replace(phone, '[()-+-]', '')), 256) as phone,
SHA2(date_format(birthday, 'yyyyMMdd'), 256) as birthday,
* EXCEPT(email, name, phone, birthday)
from sensitive
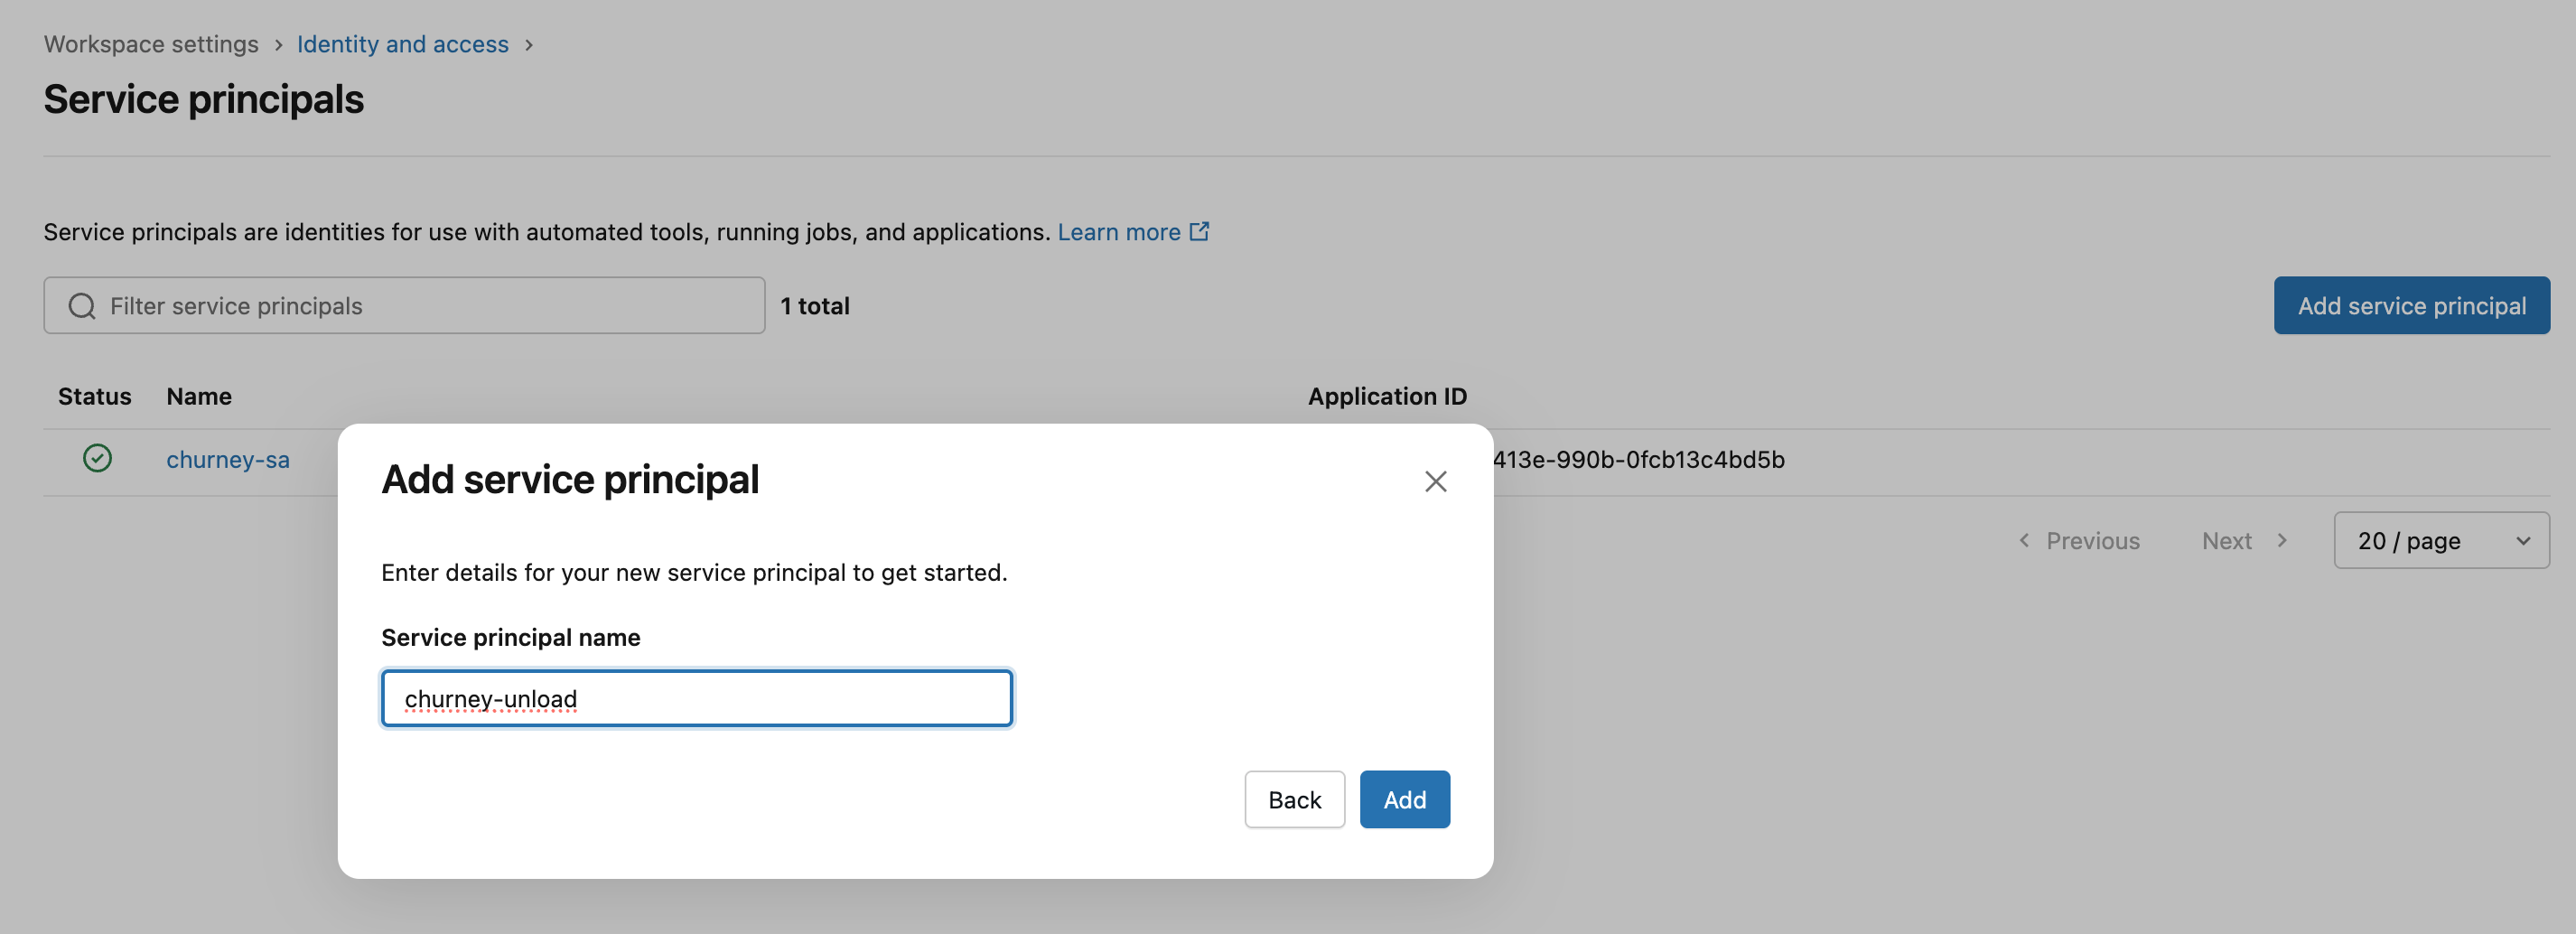
Go to your account -> Settings, and then Identity and access -> Users and create the service principal:


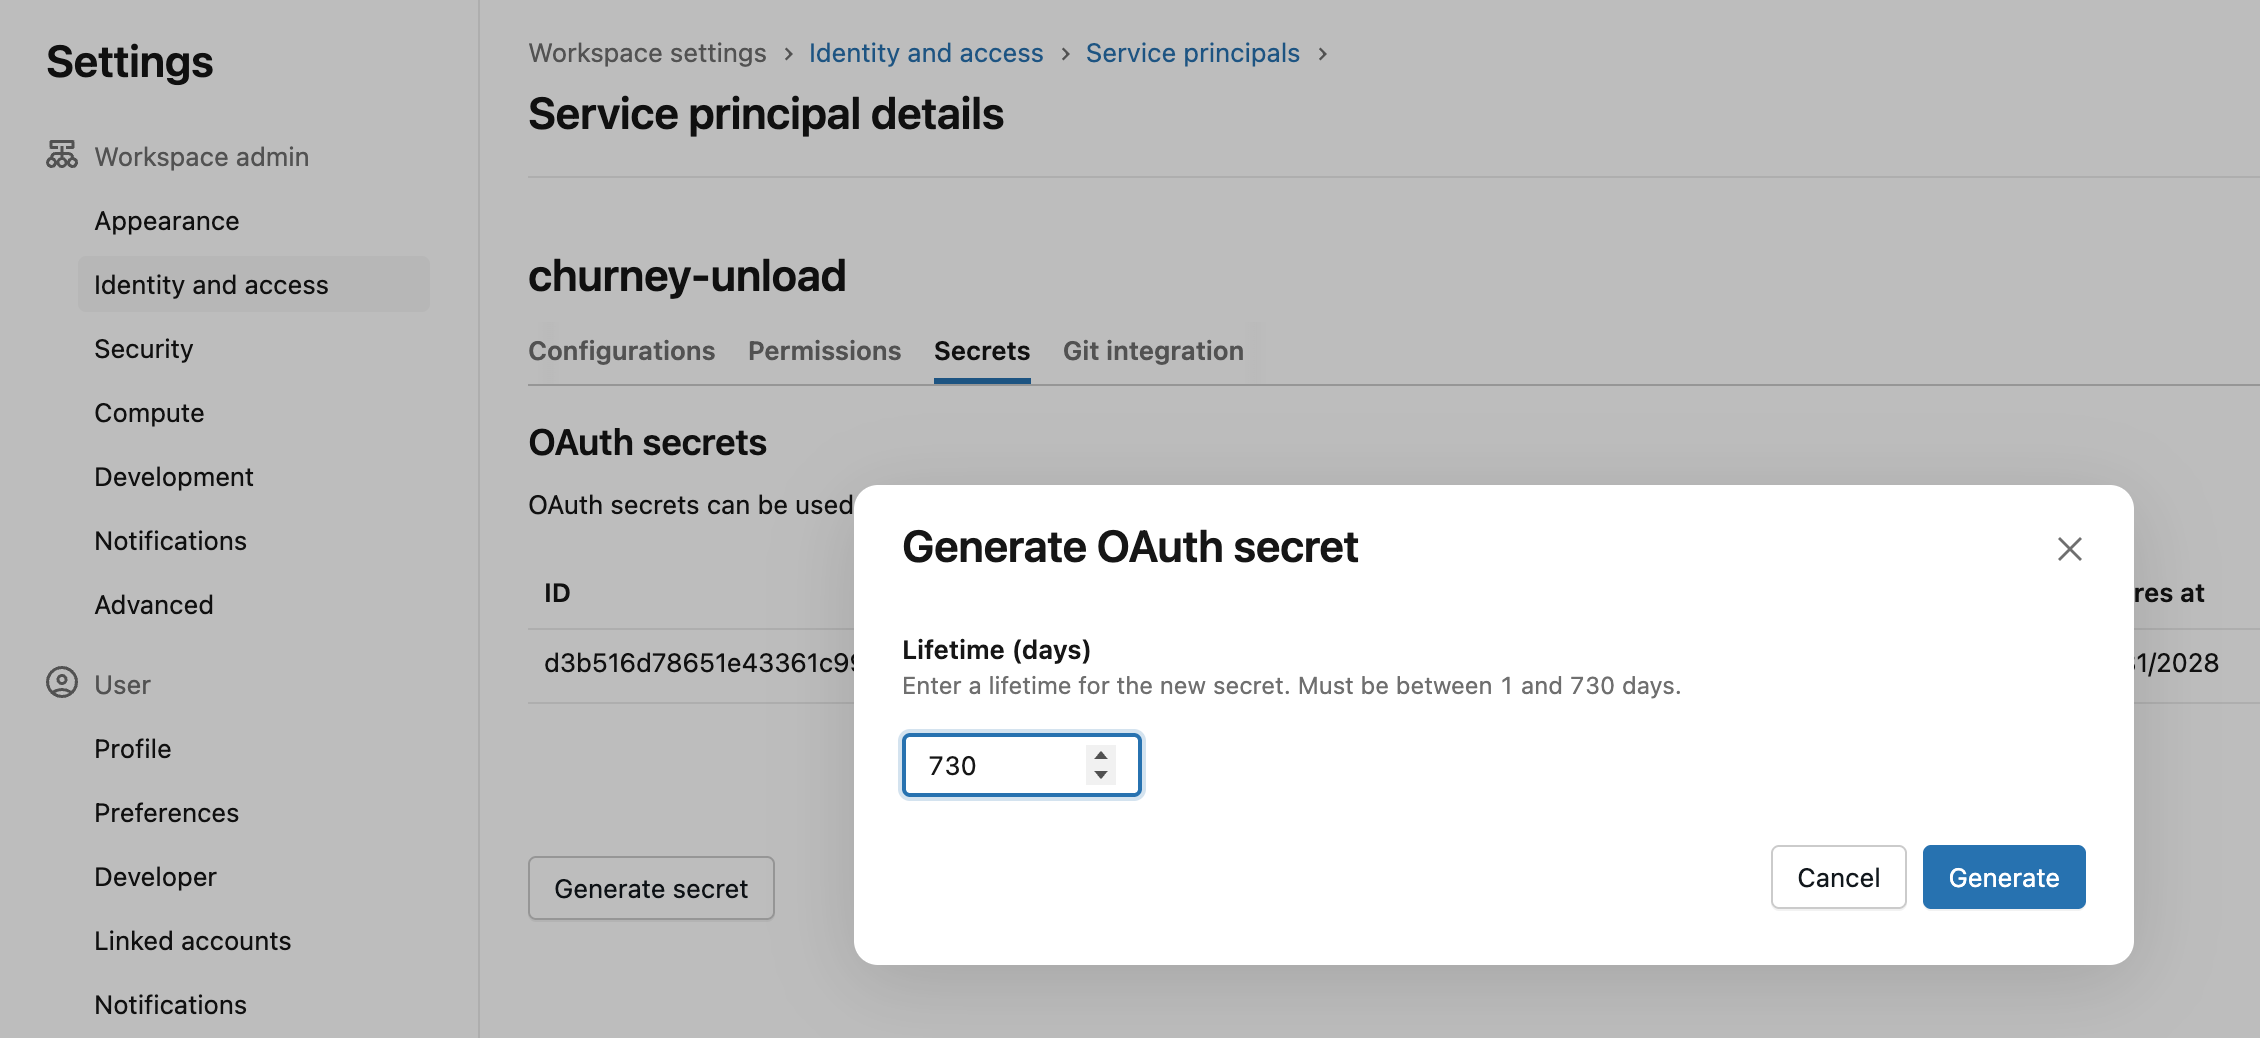
Then go to the service principal to generate a token as below. The maximum lifetime is 730 days, so please use that. Store the secret somewhere safe for now.
Create a group for the churney service princial as below:

And add the service principal to the group:
Let's create an s3 bucket for Churney. Make sure it is in the same region as your Databricks and public access is blocked.

In this example, we are creating a bucket named churney-databricks-unload.

First, we need to create a role and assign policies for Churney in AWS.
Go in IAM -> Policies in your AWS account:

And create a policy for Churney to access the bucket we created previously
{
    "Version": "2012-10-17",
    "Statement": [
        {
            "Sid": "VisualEditor0",
            "Effect": "Allow",
            "Action": [
                "s3:PutObject",
                "s3:GetObject",
                "s3:ListBucketMultipartUploads",
                "s3:ListBucket",
                "s3:DeleteObject",
                "s3:GetBucketLocation",
                "s3:ListMultipartUploadParts"
            ],
            "Resource": [
                "arn:aws:s3:::<churney-s3-bucket>/*",
                "arn:aws:s3:::<churney-s3-bucket>"
            ]
        }
    ]
}
Replace <churney-s3-bucket> with the name of the bucket you created above, in this example, with churney-databricks-unload
Then go to Roles to create a new role for churney with Custom trust policy:

and put this in the JSON field:
{
    "Version": "2012-10-17",
    "Statement": [
        {
            "Effect": "Allow",
            "Principal": {
                "Federated": "accounts.google.com"
            },
            "Action": "sts:AssumeRoleWithWebIdentity",
            "Condition": {
                "StringEquals": {
                    "accounts.google.com:sub": [
                        "<id_1>",
                        "<id_2>"
                    ]
                }
            }
        }
    ]
}
Replace <id_1> and <id_2> with the ids of the service accounts that Churney will give you.
Make sure you add the policy to the Churney role:

Go to your Databricks under Catalog -> Add a storage credential and create a storage credential, where you enter the arn of the churney role you added above. The output should look like below:

Now, go back to the role in AWS and update the trust policy as below:
{
    "Version": "2012-10-17",
    "Statement": [
        {
            "Effect": "Allow",
            "Principal": {
                "Federated": "accounts.google.com"
            },
            "Action": "sts:AssumeRoleWithWebIdentity",
            "Condition": {
                "StringEquals": {
                    "accounts.google.com:sub": [
                        "<id_1>",
                        "<id_2>"
                    ]
                }
            }
        },
        {
            "Effect": "Allow",
            "Principal": {
                "AWS": "arn:aws:iam::<your-aws-account-id>:role/<this-role-name>"
            },
            "Action": "sts:AssumeRole"
        },
        {
            "Effect": "Allow",
            "Principal": {
                "AWS": "arn:aws:iam::414351767826:role/unity-catalog-prod-UCMasterRole-14S5ZJVKOTYTL"
            },
            "Action": "sts:AssumeRole",
            "Condition": {
                "StringEquals": {
                    "sts:ExternalId": "<external_id>"
                }
            }
        }


    ]
}
where the <external_id> is in your storage credential details
Go to the storage credential and grant the below permissions to yourself

And finally run this on your SQL Editor:
CREATE EXTERNAL LOCATION IF NOT EXISTS `churney_external`
URL '<s3_url>'
WITH (STORAGE CREDENTIAL `churney_storage_credential`);
where the url contains your s3 bucket. In this example, the sql will look like below:
CREATE EXTERNAL LOCATION IF NOT EXISTS `churney_external`
URL 's3://churney-databricks-unload/'
WITH (STORAGE CREDENTIAL `churney_storage_credential`);
Then run:
GRANT CREATE EXTERNAL TABLE ON EXTERNAL LOCATION `churney_external` TO `Churney`;
GRANT READ FILES ON EXTERNAL LOCATION `churney_external` TO `Churney`;
Let’s assume that you would like to share the views under churney_views with Churney.

Churney will create external tables pointing at the s3 bucket, so let’s create a schema for the churney_exports
CREATE SCHEMA aws.churney_exports;Churney will maintain the exports here, so grant the permissions below:

For the churney_views schema, Churney only needs Data reader, so grant those permissions as below:

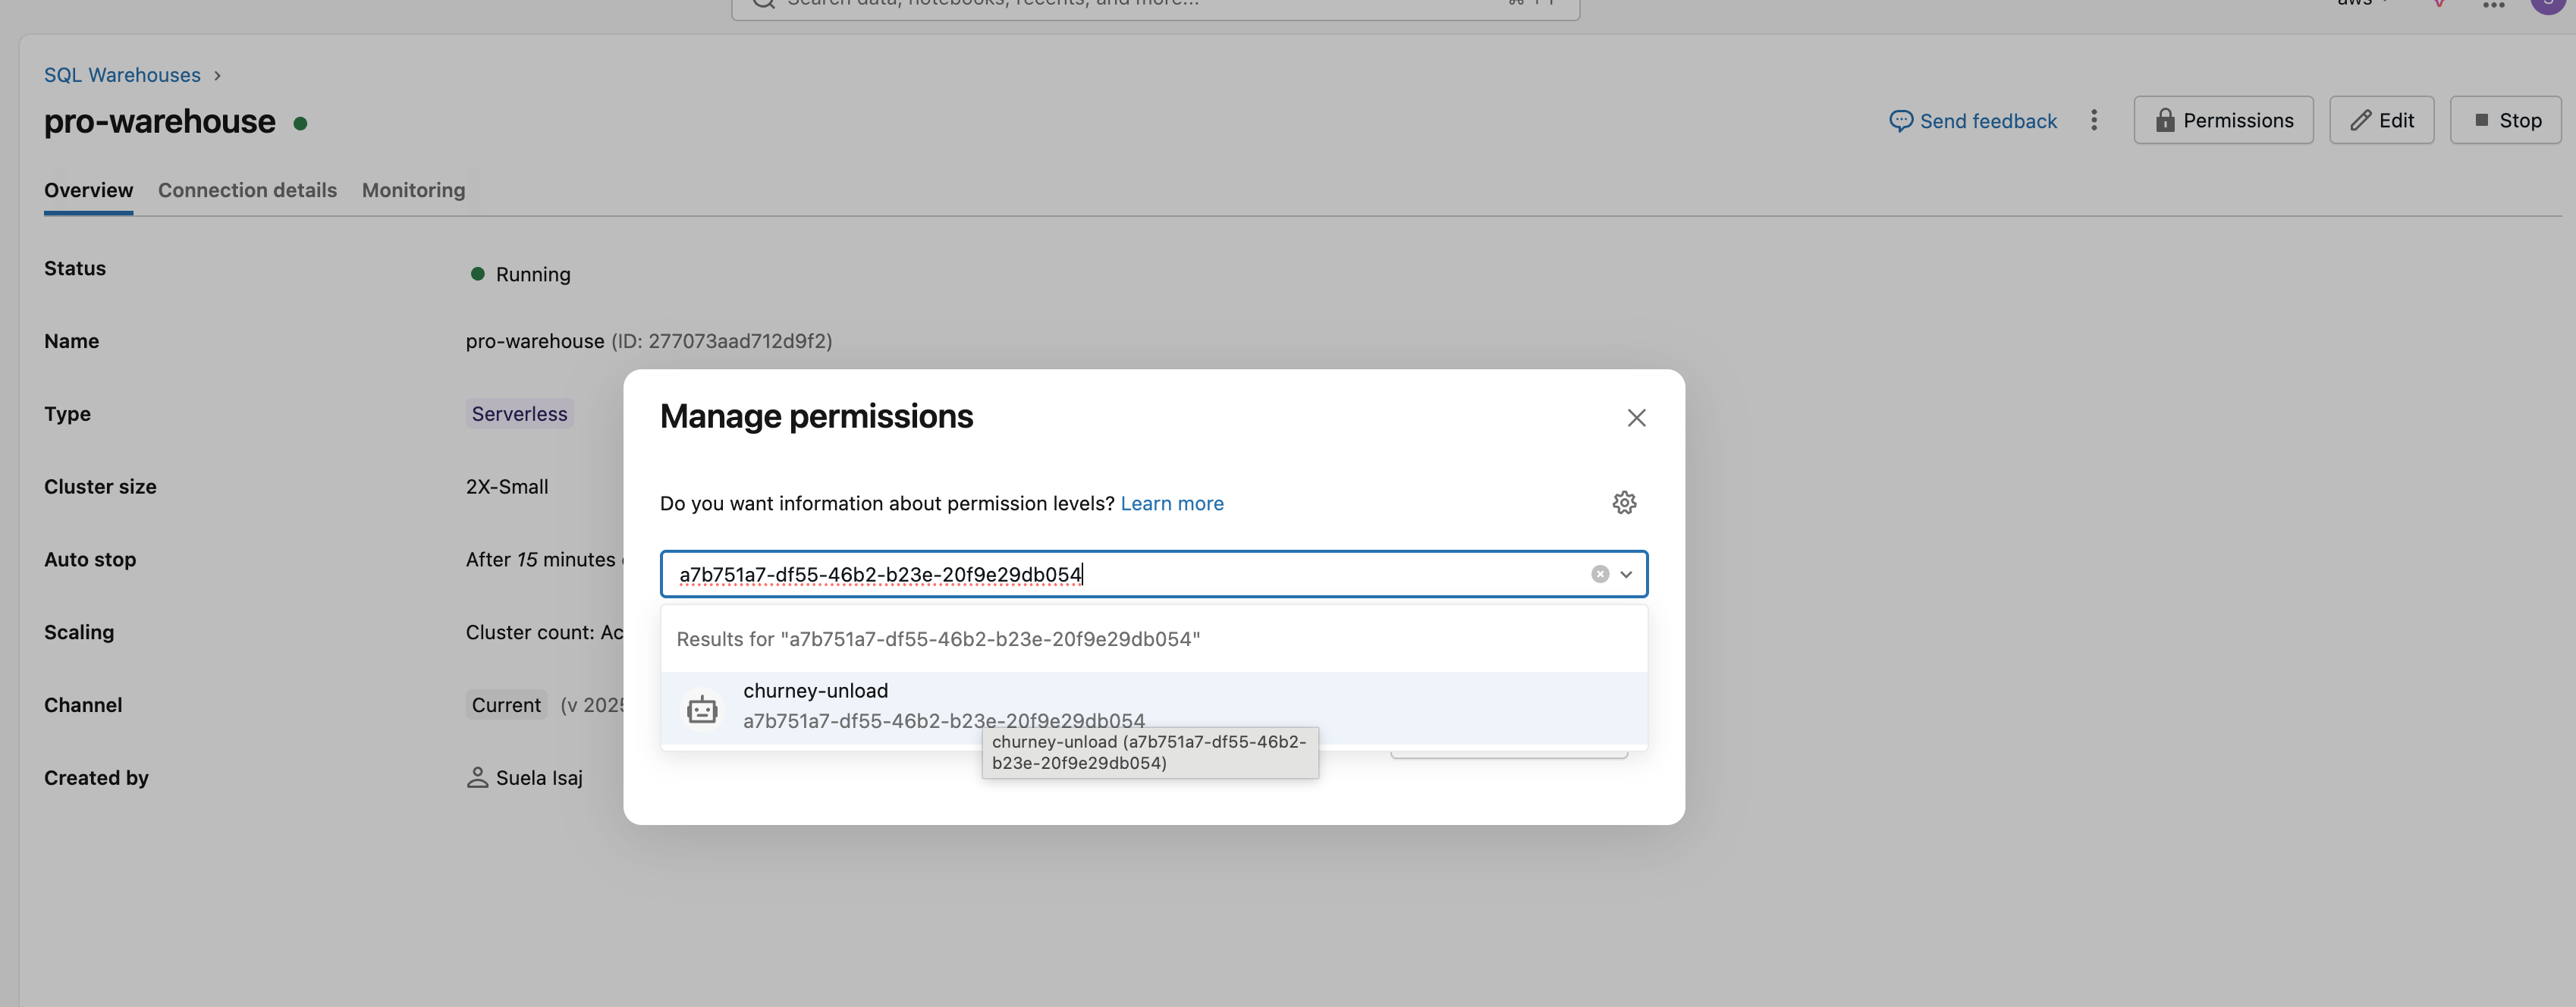
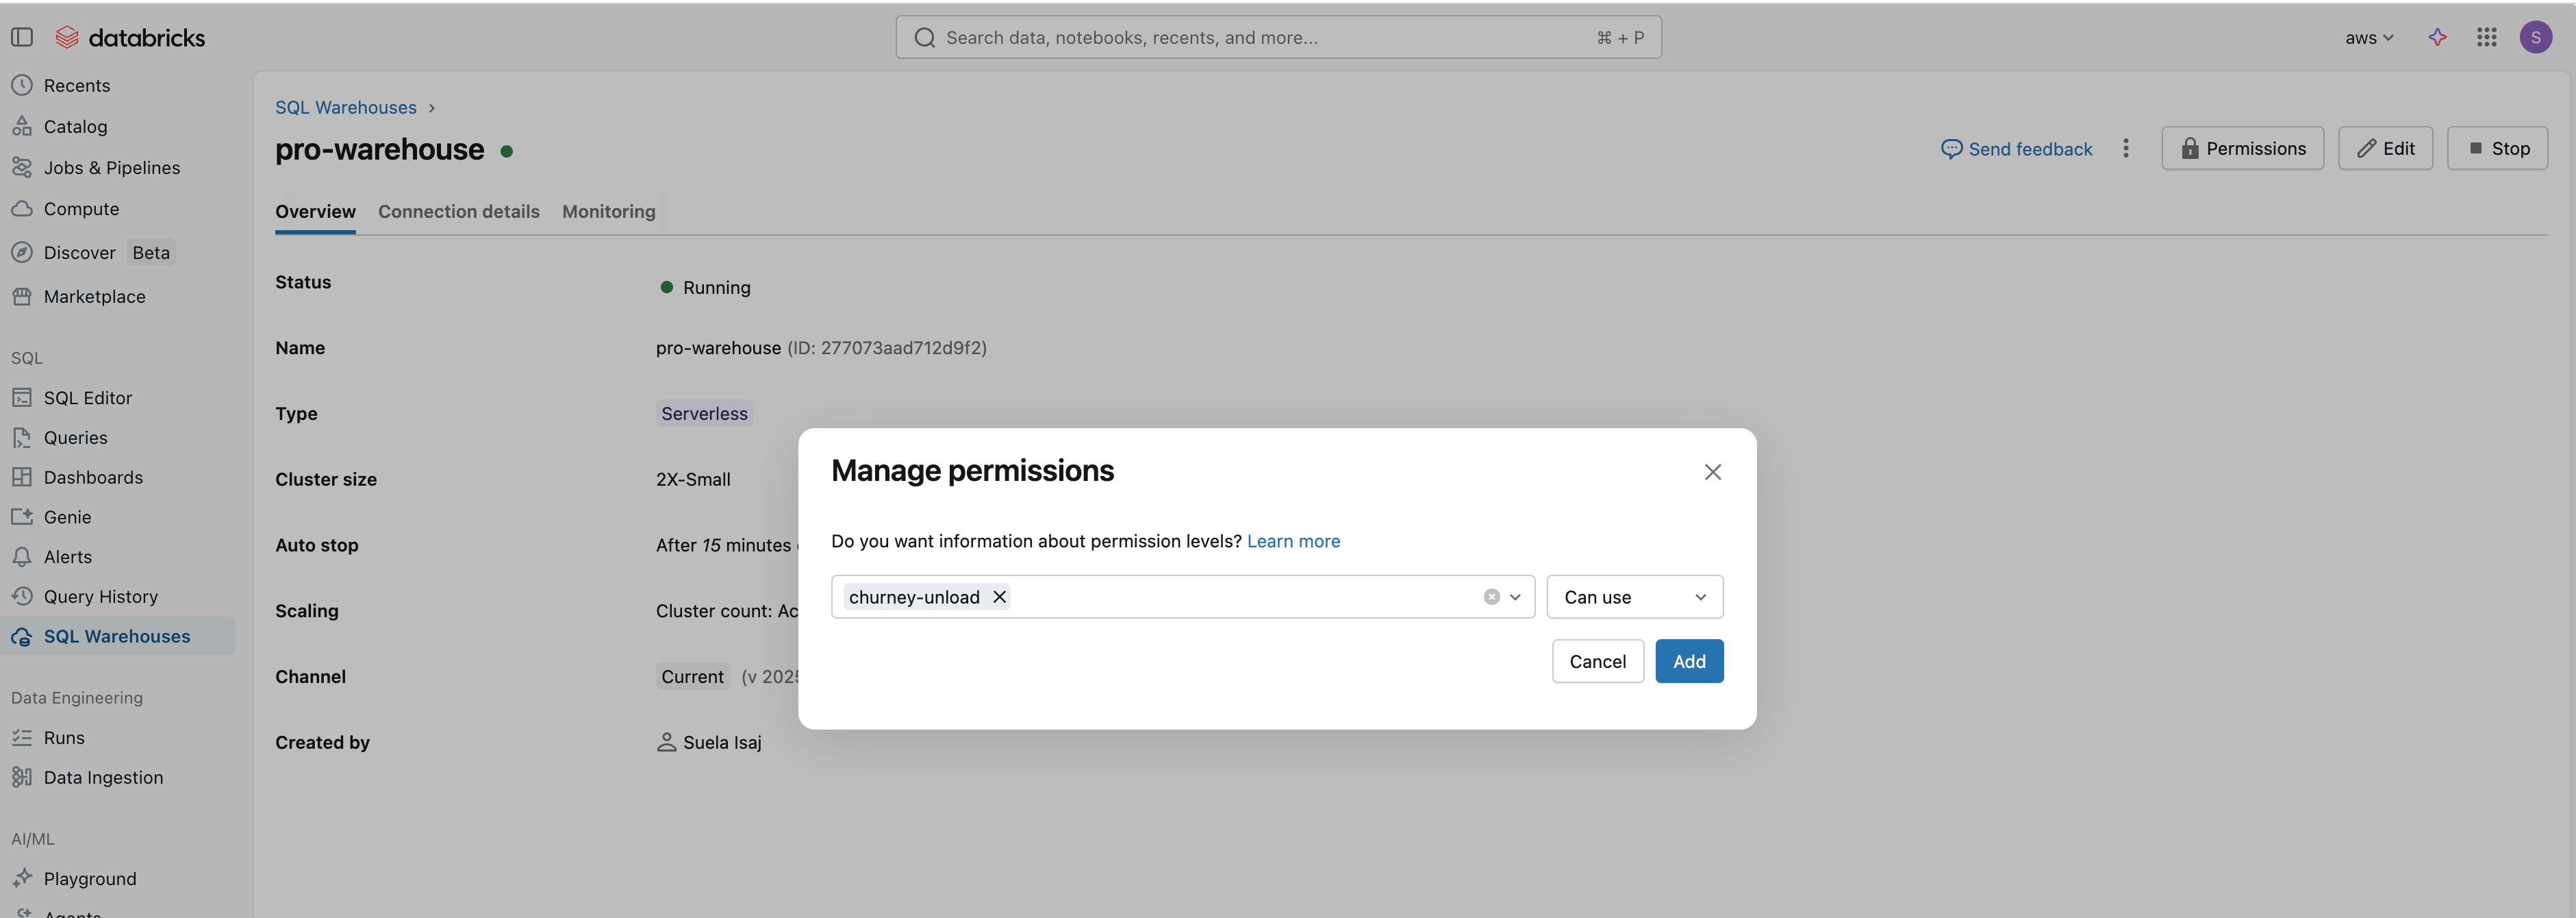
Finally, go the your warehouse, and add the service principal as below:

churney_exports)churney-databricks-unload)arn:aws:iam::*******:role/churney-databricks-access-role)aws)server_hostname and http_path as below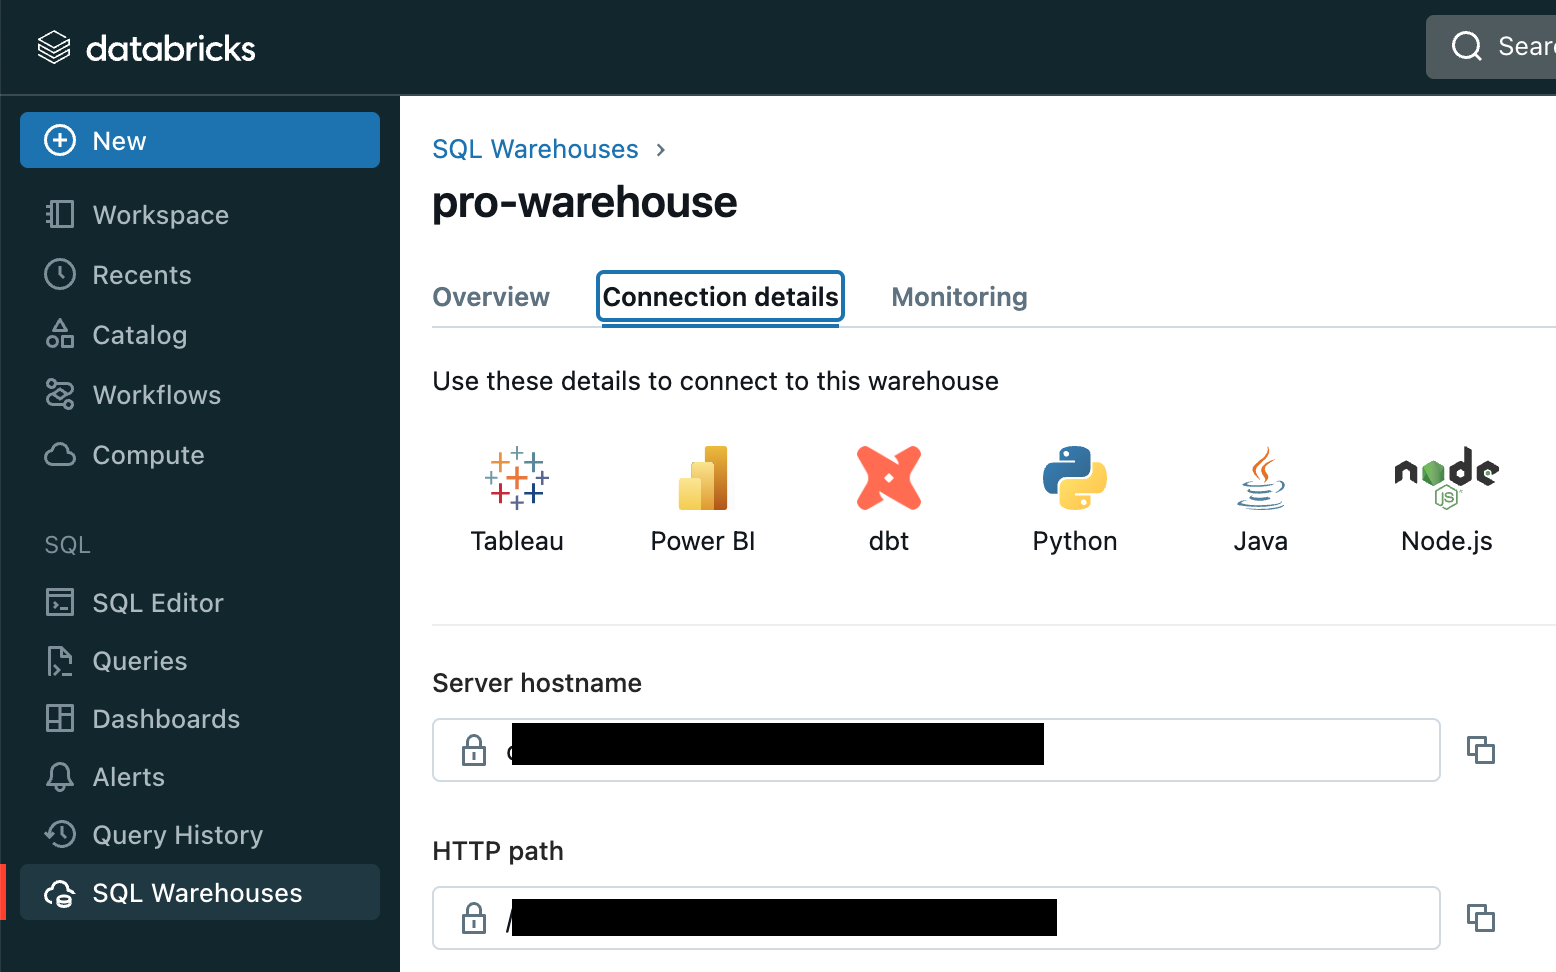
Your data warehouse has incredible value. Our causal AI helps unlock it.
